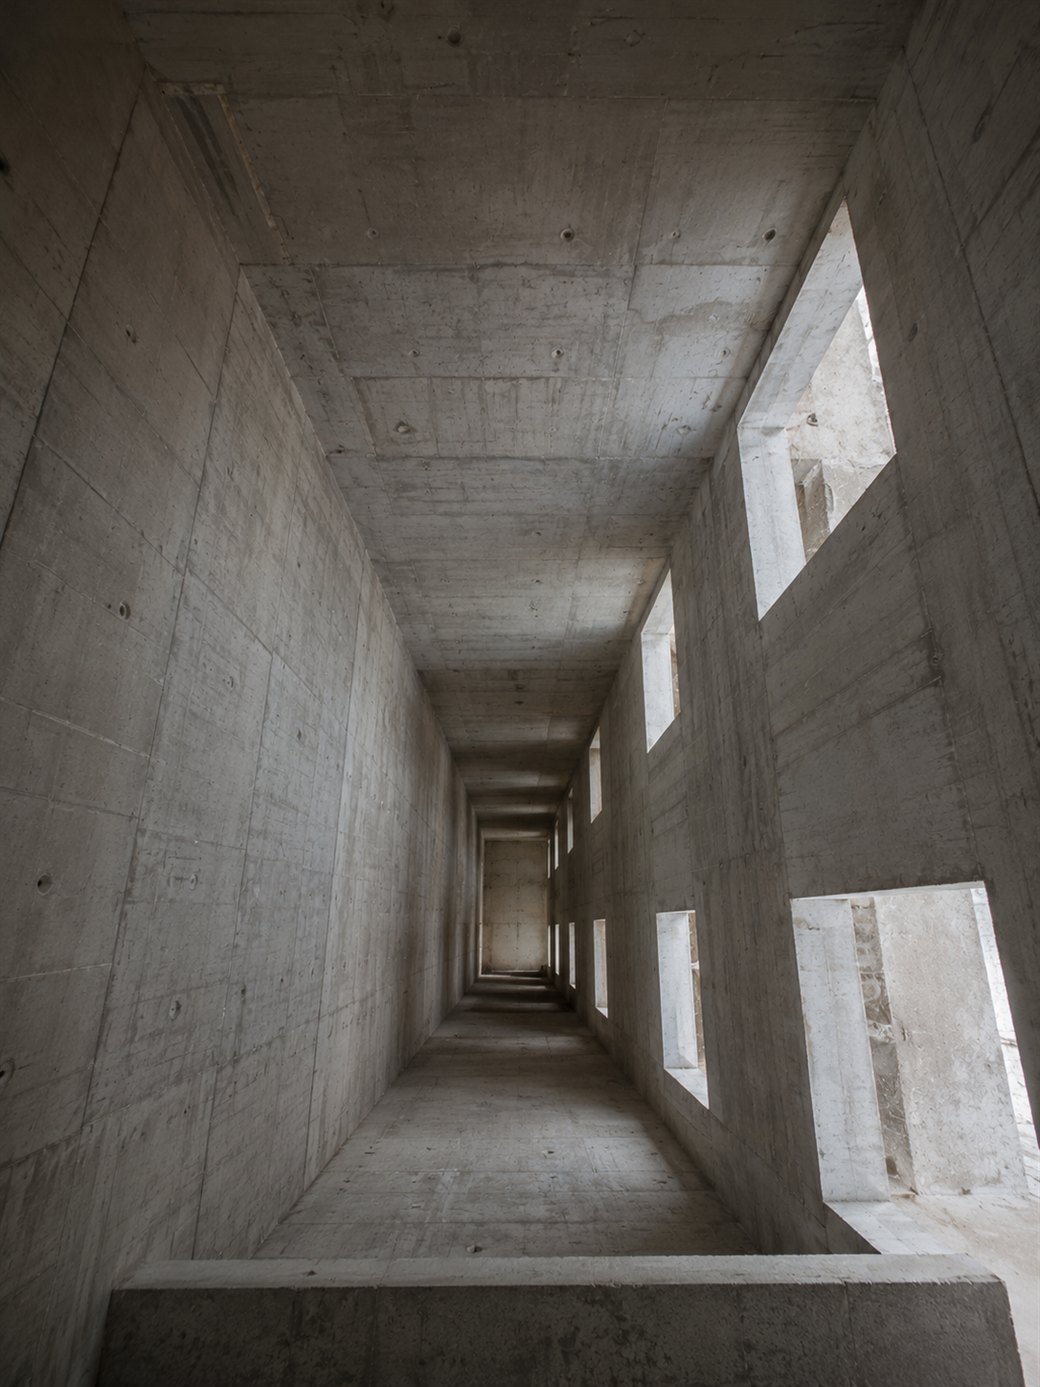
Seeing an empty elevator shaft is a strange experience. A vertical concrete void, dark and featureless, stretching from the pit below the ground floor all the way to the roof, with nothing inside it. At this stage nobody goes in there or even wants to get close, but a few weeks or months later this shaft will become the heart of the building, the place where a precision machine will carry the residents hundreds of times a day for thirty years.
In this empty space, which probably none of the residents will ever see, precise and meticulous work takes place that will determine whether your elevator rides smoothly or shakes, stops exactly level with the floor or leaves a small step, and even whether it is quiet or noisy. So let's step inside and see exactly how an elevator is installed, step by step.
The first step in turning the idea into reality
Planning and drawing the shaft starts at the architectural design stage, on paper. That is when the figures that dictate its size and structure are set: how many floors the elevator serves, how many passengers it carries, how fast it travels and which drive system it uses. From these figures come the shaft dimensions, the pit depth, the clearance needed at the top of the shaft, the loads the structure must carry, the right electrical connection, and more.
In a new building this happens on the drawing board with the architect, while in an existing building it starts with an engineering survey on site. In both cases precision is critical. Changing the shaft structure after the concrete has been poured can cost a great deal and delay the project significantly.
There are three main types, and each has different requirements
The installation sequence is very similar for all elevators, but critical parts of the system design are completely different, depending on the drive method and where the motor sits. Here is a short explanation of the three methods, and they are worth remembering because we will come back to them later:
Electric elevator with a machine room
The motor, the traction sheave and the controller sit in a dedicated room above the shaft. This is the older design, and it is not very common in new residential buildings today.
Machine-room-less elevator (MRL)
The same electric elevator, but with a compact motor installed inside the shaft itself. This is today's standard. The initials come from English and simply mean Machine Room-Less.
Hydraulic Elevator
The elevator car is mounted on a massive piston that pushes the car up from below using hydraulic pressure. There are no ropes and no counterweight, and the power unit usually sits in a cabinet next to the shaft.
If you want to understand the differences between the types in depth and which one suits which building, we wrote a whole article about elevator types. Here we will leave it at that, and point out each time the steps diverge.
The shaft, the pit and the headroom
These three spaces are not built or designed at random. There are legal requirements anchored in the official Israeli standard, SI 2481, and the shaft, the pit and the headroom must meet them. The building contractor is responsible for building the shaft to these requirements, and the elevator company is responsible for working with the existing shaft and staying within the permitted dimensions and tolerances. A shaft that was built wrongly or inaccurately can create a major problem that requires construction work before the elevator can be installed.
The shaft
The vertical space the elevator travels in. It can be cast concrete, a clad steel structure, or a combination. Two things matter most: that it is truly plumb (deviations from true vertical, even very slight ones, can cause big problems when installing the guide rails and in ride quality later on), and that it is clear. No pipes, air-conditioning ducts or cables that don't belong to the elevator may run through the shaft, and this is not pedantry but a safety requirement. Every unnecessary protrusion eats into clearances that are there to protect a person working inside the shaft.
The pit
The space below the level of the lowest floor. Many people are surprised to learn it exists at all. It is needed for two reasons: under the car floor there is a steel frame that takes up space, and for the car floor to be level with the lobby floor, everything beneath it has to be recessed. The second reason is more important: the pit holds the buffers, which soften the impact and absorb the energy if the car keeps going below the lowest stop, and it leaves a protected space where a person can stand safely under the car. That is why the pit must be dry and sealed, with drainage. Water in the pit is one of the most expensive problems to fix after the fact.
The headroom
The clearance above the top floor. Here too, the space exists so that a safe area remains above the car when it is at the highest floor, and in an MRL elevator it also houses the motor itself. Don't get confused: a machine-room-less elevator still needs enough height at the top of the shaft. It saves the need for a room, but not the need for clearance.
On top of these three, there are the door openings on every floor, which must be aligned precisely one above the other, and the lifting beam at the top of the shaft, used to hoist heavy equipment during the work.
From an empty shaft to an elevator, this is more or less the order of work
The shaft is ready and in good order, and the work can begin. From here on it is important to work in an orderly way, following a clear and well-known sequence. Each step relies on the one before it, and skipping a step or being inaccurate at one stage rolls forward and affects every step that follows. These are the ten steps we chose to describe, in the order they actually happen:
Surveying and setting the axes
The first step inside the shaft involves no construction and no noisy machinery at all. In fact, it happens quietly and gently. A rigid template, a wooden or steel board, is fixed at the top of the shaft, and from it thin, taut steel wires with a weight at the end are lowered down, what the trade calls a "plumb line". The wires run the full length of the shaft down to the pit and mark out in space the exact axes of the car rails, the counterweight rails and the door sill on every floor.
This part takes a lot of patience: nothing may be marked as long as the wire and the plumb bob are still moving. A hanging weight swings in tiny oscillations, and every draft of air in the shaft moves it. The taller the shaft, the longer the wire, the more sensitive it is and the more slowly it settles. So you wait until the wire is completely still. What is usually done to speed things up is to dip the weight in a bucket of water or oil, which damps the swinging. Only a wire that doesn't move at all is a true plumb line.
And what does "precise" mean here? The distance between two rails is held to a tolerance on the order of a millimeter, and verticality along the whole shaft is measured in single millimeters over tens of meters. Modern projects also use laser instruments, but the plumb-line method has stood the test of time because it is so reliable and simple.

Scaffolding or a work platform
Before anything can be installed, there has to be something to stand on. There are two approaches.
The traditional method: a scaffold is built up the full height of the shaft. It is stable and familiar, but it takes up the whole space, is slow to put up and take down, and limits how equipment can move inside the shaft. This method also mainly suits relatively low shafts, because the taller the building, the more expensive and cumbersome a full-height scaffold becomes.
The modern method: working with no scaffold at all. Instead, a suspended work platform is used. The crew stands on top of the platform, installs the section above it, and climbs upward as the work progresses. Later on, once the car frame is already installed and suspended, the roof of the car itself can serve as the work surface instead of the platform. This shortens installation time significantly and improves safety.
In very tall buildings there is an even more sophisticated method, where the elevator is installed in the lower part of the shaft, serves the contractor as a fully fledged construction elevator, and "jumps" upward in stages as the building grows.
The guide rails
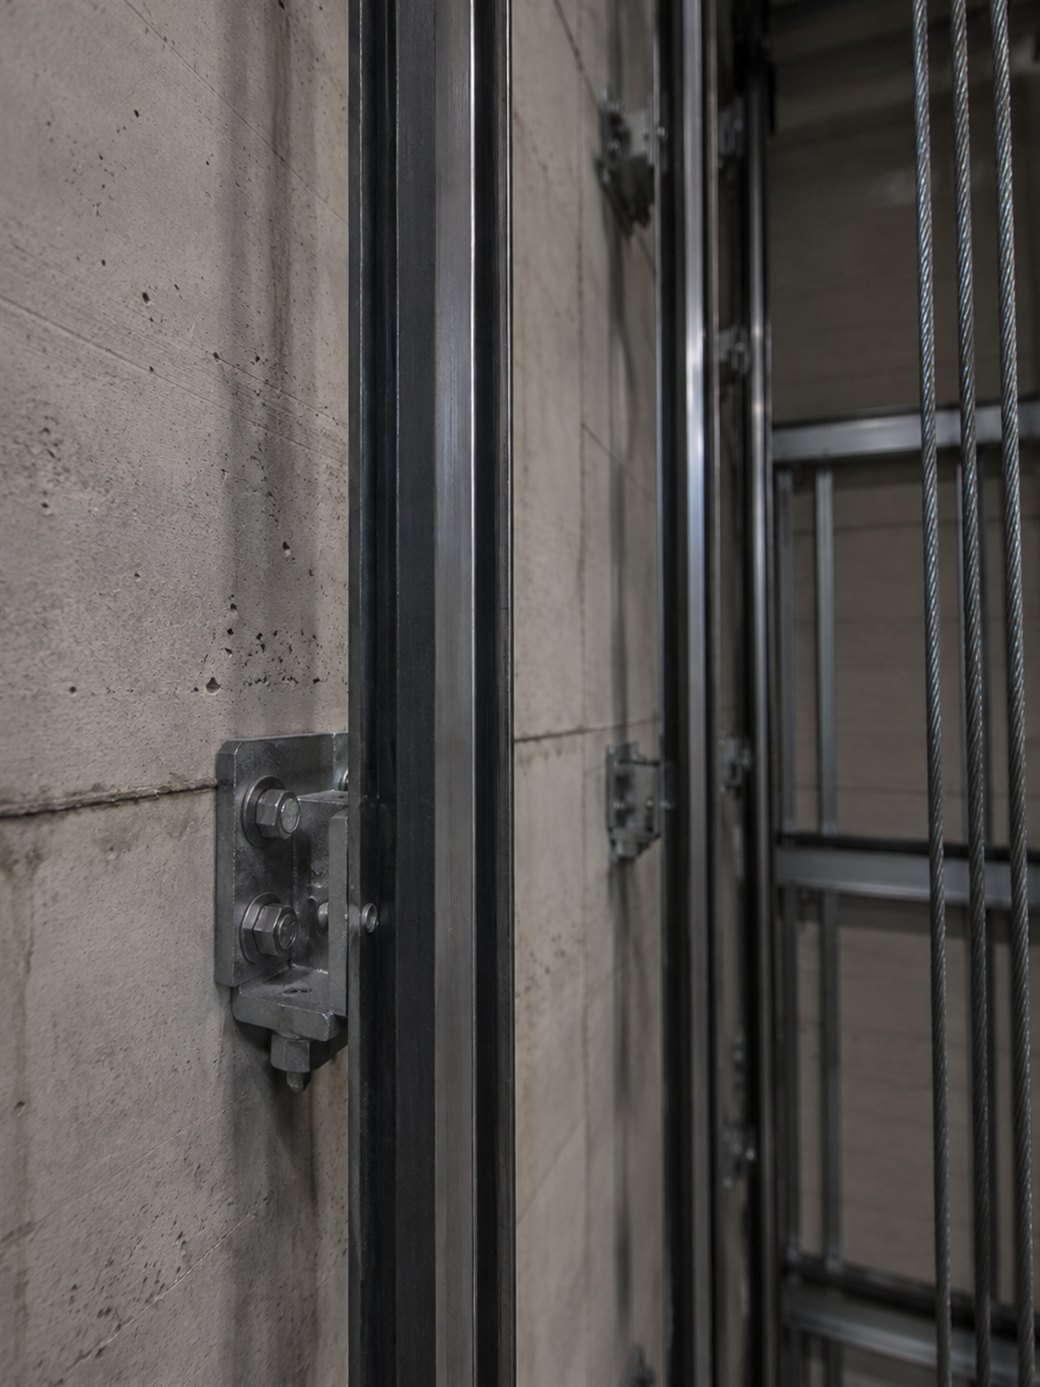
The rails are the first part that is actually assembled and anchored to the building structure. First, steel brackets are anchored to the shaft walls at fixed intervals, and the guide rails are attached to them: T-section steel rails assembled section by section from the pit upward and joined with fishplates. There are two pairs of rails, one for the car and one for the counterweight.
Every section is aligned against the plumb lines and tightened. This stage demands the highest precision, and it affects how the elevator ride will feel more than anything else. Well-aligned rails give a quiet, smooth ride. Rails that are off, even by millimeters, cause vibration, noise and accelerated wear of the guide shoes. The work done here will have an impact for decades: what you feel in a twenty-year-old elevator is largely decided here, in these weeks.
The pit equipment
At the bottom of the shaft, in the pit, the buffers are installed on anchored bases. Their job is to absorb the impact if the car or the counterweight overruns the lowest stopping point. Spring buffers are usually used for slow elevators and oil buffers for higher speeds. A hydraulic elevator has no such buffer under the car, because the car sits on the piston anyway, and the piston itself acts as a buffer.
Next to them, a pit ladder, an emergency stop switch, lighting and sometimes the tension pulley of the overspeed governor are installed. The pit stops being an empty space and becomes a fully equipped station.
The drive system
Remember what we said about the three types of elevator? This is the stage where the difference shows.
Elevator with a machine room
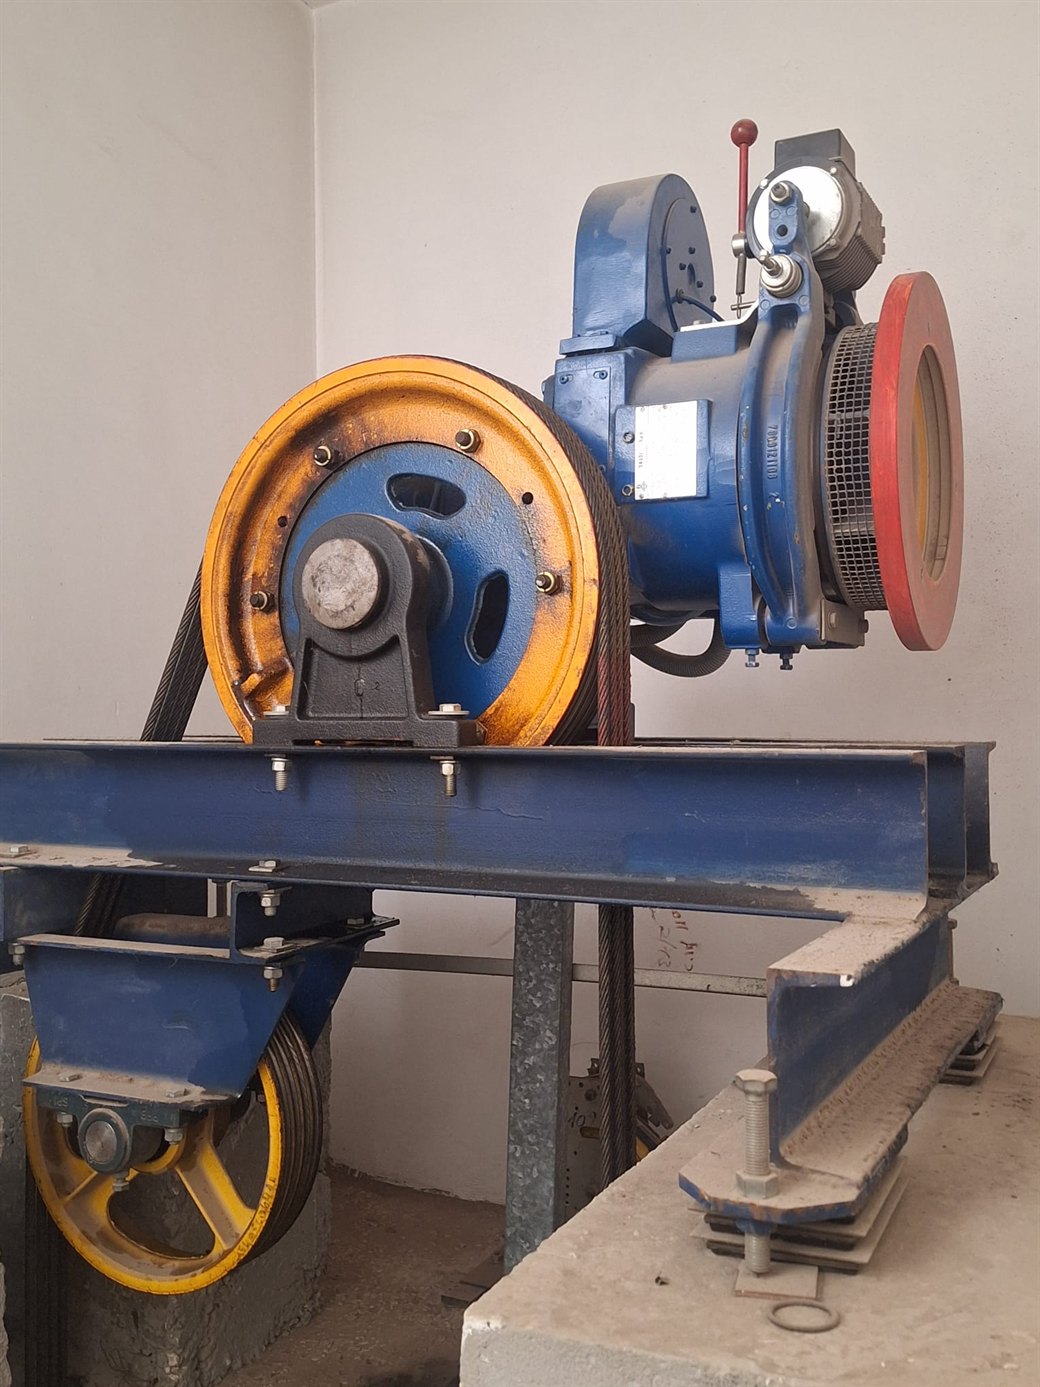
The machine, meaning the motor together with the traction sheave and the brake, is hoisted into the room above the shaft and set on a vibration-isolated base, so that noise doesn't travel into the building structure and the apartments. Alignment is critical: the traction sheave must sit exactly above the axes marked by the plumb lines, otherwise the ropes won't run straight, leading to increased wear, noise and vibration.
Machine-room-less elevator
Here the machine is flat and compact, usually a permanent-magnet synchronous motor, and it is installed inside the top of the shaft, supported on the rails themselves or on a dedicated beam. The controller doesn't disappear; it moves to a locked cabinet on the top floor, usually next to the door.
Hydraulic Elevator
There is no motor at the top of the shaft and no ropes, but a massive hydraulic piston that the car is mounted on. There are two methods: an in-ground piston, which requires a vertical borehole under the pit about as deep as the travel height, or side pistons with no drilling, which push the car from the sides and are especially suited to existing buildings where drilling isn't possible. At the same time, the power unit is installed in a nearby cabinet: an oil tank, a pump, a motor and a valve block, with pressure piping connected to it. One of the most important valves is the safety valve, which is there to prevent the car from dropping if a pipe ruptures.
The car frame and the counterweight
Inside the pit, the car frame is assembled: a load-bearing steel frame on which the car that passengers ride in will later sit. The frame also carries the guide shoes, which slide along the rails, and the safety gear, a mechanical safety device that can grip the rails and stop the elevator if it goes down too fast.
At the same time, the counterweight is built: a frame filled with metal blocks according to a precise calculation. It weighs roughly as much as the empty car plus about half of the rated load, and that is how it balances the system. This is why a relatively small motor can move a heavy car: it doesn't lift the weight, it only moves the difference between the weights.
And in a hydraulic elevator? There is no counterweight at all, because the piston pushes from below instead of pulling from above. You save the frame, its rails and the space in the shaft, and pay for it with higher electricity consumption on the way up.
Suspension: roping the elevator or connecting the piston
Until this moment, the frame simply stood in the pit on temporary supports. It wasn't suspended yet and couldn't move. This step takes the car from that in-between state to the point where it hangs from the suspension ropes, and it is one of the most complex and delicate steps of the whole installation.
In an electric elevator, the steel ropes (in some of today's modern systems, the ropes have been replaced by flat belts) are threaded from the frame's anchor point upward, around the traction sheave, and from there down to the counterweight. This is heavy physical work done in a narrow space and at height, and it requires careful fall protection. Once the roping is complete, the next step is tensioning the ropes. All the ropes must carry equal tension. If one is tighter than the others, it carries a bigger share of the load and wears faster than the rest. This uneven wear shows up months or years later, and it can lead to replacing the suspension system more often, or even, in extreme cases, to a rope breaking.
And then comes an exciting moment: the supports are removed, slowly, and for the first time the system hangs on its own. From here on it can move. It is given a first ride at inspection (creep) speed, under full supervision and control from the car roof.
In a hydraulic elevator, the equivalent of this step is connecting the frame to the top of the piston, filling the system with oil, and bleeding all the air out of the piping. Air trapped in the oil causes a jumpy, unstable ride.
The landing doors and the car door
Now that the car can be moved along the shaft, the doors are installed. On every floor: a frame, a sill, a sliding mechanism and, above all, a safety lock.
This lock has a more important safety role than it seems, and it does two things at once. It prevents the elevator from moving as long as any door is open, and it prevents a landing door from opening when the car isn't there. Note that the landing door can't move on its own: the car door drives it, through a coupling mechanism that connects the two only when the car is at the right level.
One more point worth mentioning: doors are one of the leading causes of faults throughout an elevator's life. They are among the parts that move the most during the day, sometimes thousands of times a day, and they are in direct contact with people. People get stuck in them with strollers, lean on them, push them and try to stop them by force, and all of this causes cumulative damage. That is why how they are adjusted at installation will directly affect the elevator's reliability for the next decade.
Assembling the car
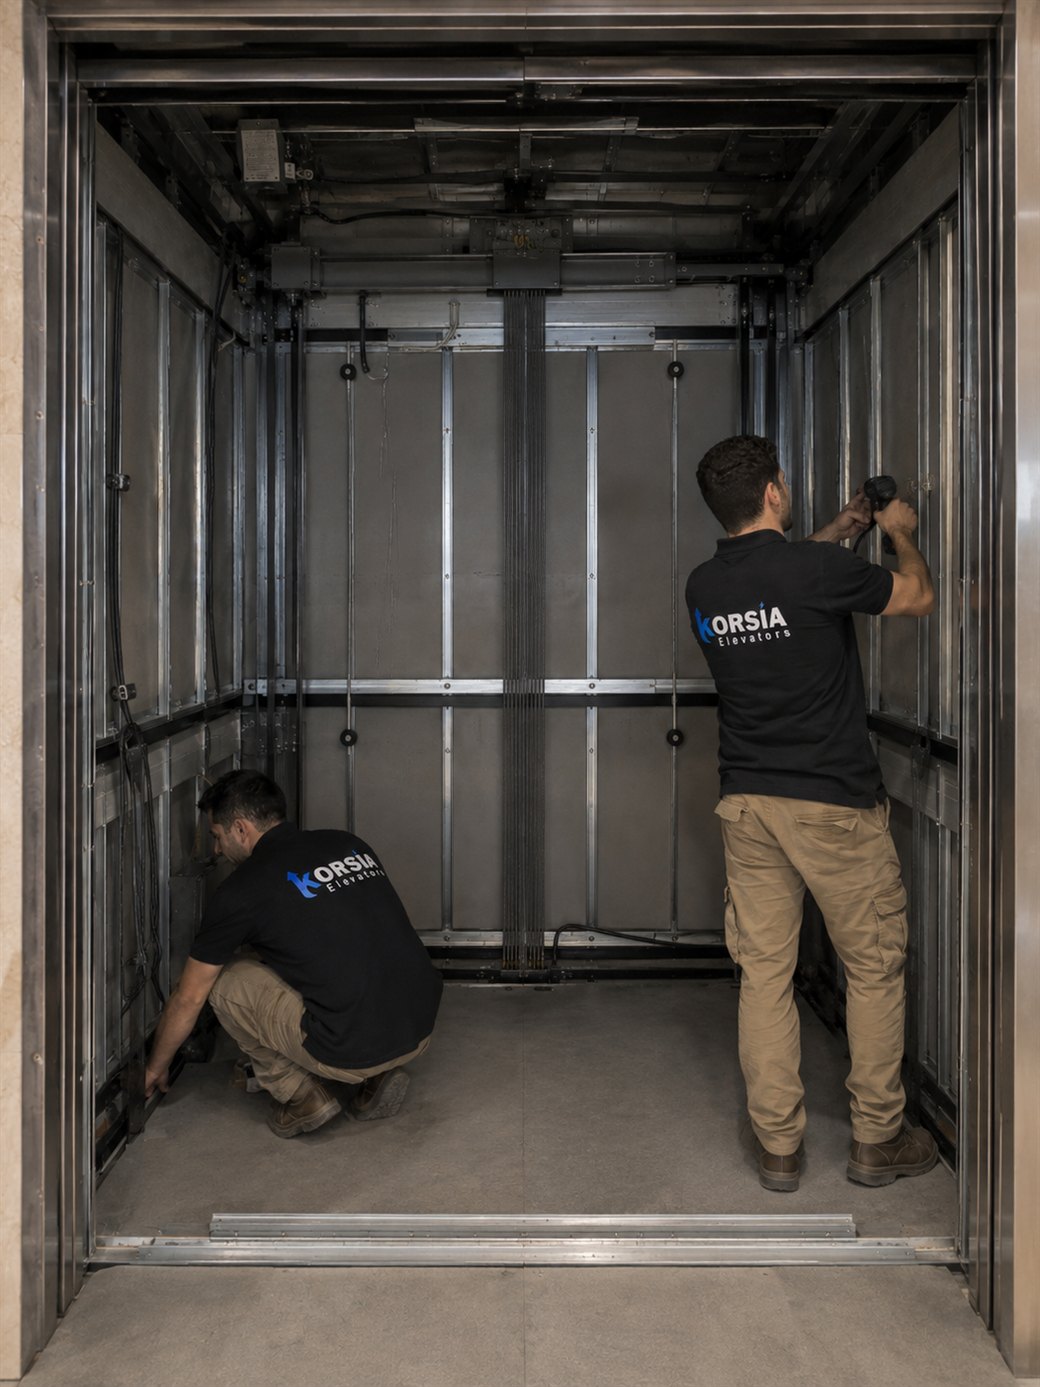
Only now, relatively late in the sequence, comes the only part passengers will ever see. The car itself is assembled on the frame: walls, ceiling, lighting, floor, handrail and sometimes a mirror. Inside it, the button panel, the emergency communication system, the emergency lighting and the optical sensors that stop the door from closing on you as you get in and out are also installed.
This stage wraps up all the mechanical work inside the shaft. The car now looks the way it will look for years, and everything that makes the elevator work mechanically is in place.
Electrical and controls
The last stage of assembly connects everything to a single brain. The controller is installed and wired, and a flat cable is connected to the car that hangs inside the shaft and flexes up and down as the car moves (in the trade it is called a traveling cable). This cable carries power and communication between the controller and everything on and inside the car.
In addition, the limit switches that restrict travel at the ends are installed, along with the position sensors that let the controller know at every moment where the car is, the call buttons at every landing, and the connection to the emergency monitoring center.
By the end of this stage the elevator is essentially complete and fully assembled. It runs and does everything required of it. But one more stage is still missing before it becomes an elevator you'll want to ride in.
Calibration
You know the feeling. Some elevators feel like riding on a cloud, soft, smooth and precise, and some feel like a ride on an old roller coaster. This stage is what turns one into the other. After everything is ready and assembled, the controller is made to learn and understand all the information it needs about the elevator it controls.
The ride curve. An elevator doesn't travel at a single speed. It accelerates, levels off, decelerates and stops, and each of these segments is tuned separately. Acceleration that is too sharp feels unpleasant in the stomach, and acceleration that is too soft makes the elevator slow and annoying. The goal is the point where the passenger barely feels that the elevator has started moving.
Stopping accuracy. The elevator has to stop with the car floor exactly level with the landing floor. A small deviation looks negligible, but in practice it is an unexpected step, and it is one of the common causes of tripping in elevators. Here the stopping accuracy is tuned to the maximum possible.
Door timing. How long the door stays open, how fast it closes and how sensitively it reopens. A delicate balance: a door that closes too fast is stressful, and a door that lingers makes people press the button again and again.
The calibration stage is what turns a working machine into an elevator that is pleasant to ride, and it is a difference everyone feels during the ride, one that changes the riding experience and people's trust in the elevator.
Safety tests
Before the elevator is handed over for official inspection, the installing company tests all the safety systems itself, not just by looking but by deliberately triggering them. These tests include:
- The safety gear and the overspeed governor. The elevator is deliberately made to go down faster than allowed, to confirm that the overspeed governor detects it and that the safety gear "locks" the car onto the rails and stops it. This is perhaps the most important test in the process, because it checks the most important emergency system in the elevator.
- The braking system. Confirming that the brake holds the car in place even under an abnormal load.
- The pit buffers. Checking that they absorb an impact as required.
- Load test. Weights are loaded into the car, beyond its rated load, to check that the system functions and that the ropes don't slip on the traction sheave.
- Emergency systems. The alarm button, communication with a staffed monitoring center, the emergency lighting, and the automatic rescue system that brings the car to the nearest floor during a power outage.
- Door safety. Confirming that the elevator won't move under any circumstances while a door is open, and that a landing door won't open when the car isn't there.
The certified inspector: who actually approves the elevator?
There are two authorities and two officials who inspect and approve the use of the elevator. Let us explain.
The Standards Institution sets how the elevator must be built
Every passenger and freight elevator in Israel must meet the official Israeli standard for elevators, SI 2481, which is based on European standards. The standard defines almost everything: the safety systems, the safety factors of the ropes, the dimensions of the car and door openings, emergency lighting, means of communication and accessibility requirements. In addition, the company that assembles the elevator must itself be approved and hold a standard mark. A company without a standard mark simply isn't allowed to install an elevator.
The Ministry of Labor decides who is certified to check that this was actually done
The inspection itself is anchored in the Work Safety Ordinance. The rule is simple: a new elevator may not be put into use before it has been thoroughly examined by a certified inspector and a report has been issued. And here is the key definition: a "certified inspector" is not a title or position that is easy to obtain, but someone the Chief Labor Inspector at the Ministry of Labor has certified in writing. The certification comes from the state and is specific to the field.
Certified inspectors are employed by various bodies, including the Standards Institution and other accredited inspection bodies. But the authority to certify them belongs to the Ministry of Labor.
What is inspected, and what happens next
The inspector arrives after the installation is complete and examines the elevator as a complete system: the shaft structure and clearances, the rails and anchors, the drive and braking system, the safety gear and the overspeed governor, the buffers, the doors and locks, the electrical and control system, and the emergency systems. Some of the tests are carried out under load with weights and by deliberately triggering the safety mechanisms.
At the end, an official document is issued, called an inspection report (taskir), which is sent to the elevator owner, the service company and the Ministry of Labor. The report has three possible outcomes:
| Report outcome | What it means in practice |
|---|---|
| Pass | The elevator is approved for use. |
| Pass with comments | The elevator is approved for use, but defects were found that must be fixed. |
| Fail | The elevator may not be used until the defects are fixed and it is re-inspected. |
It doesn't end with the first inspection; it's only the beginning. The law says an elevator may not be used unless it was inspected by a certified inspector within the six months before use, meaning a periodic inspection twice a year, throughout the elevator's life. The responsibility for ordering the inspection and paying for it lies with the building owners.
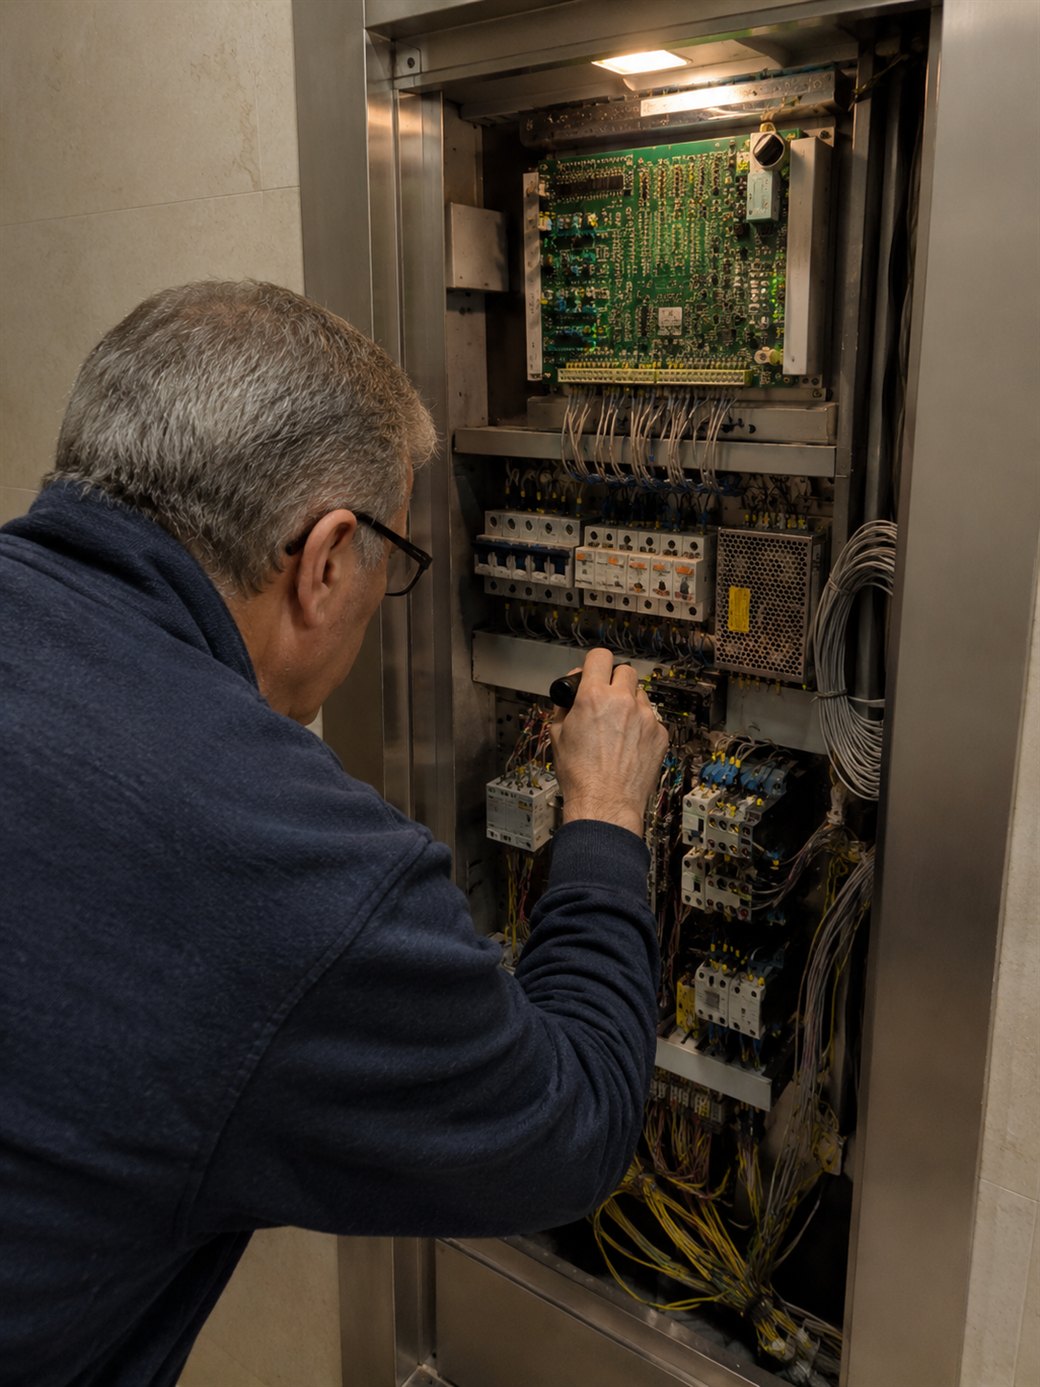
The elevator is ready. Now the long part begins.
This is where the installation stage ends and the next thirty years begin. And now you understand better what exactly is entering service: a machine that moves hundreds and even more than a thousand times a day and carries changing loads, delicate door control systems that open and close non-stop, ropes, sheaves, many kilometers of electrical wiring and electronic systems. No machine like this stays in good order on its own.
Hiring a service company isn't just a technical recommendation: Israeli law makes the elevator's operation conditional on having a service contract with an approved company, and without one the elevator simply can't operate legally.
What a service company actually does
- Regular preventive maintenance visits. Not waiting for a fault, but proactively checking the systems on a schedule.
- Door checks. Adjusting the mechanisms, locks and sensors. This is where the vast majority of faults are, so this is also where most of the attention goes.
- Checking the ropes and rails. Wear, tension and deviations, before they turn into a problem.
- Lubrication and adjustment of the moving parts, to keep the ride quiet and slow down wear.
- Safety and emergency systems. The safety gear, the brakes, the emergency lighting, and the link to the rescue center.
- Service calls and rescue at any hour. Elevators don't only get stuck during working hours.
- Accompanying the periodic inspection. Being present with the certified inspector, and closing out the defects found in the report.
And when the elevator reaches the age where replacing parts becomes more and more frequent, it's time to talk about elevator renovation and refurbishment, which is usually a better solution than a full replacement.
Frequently asked questions about elevator installation
How long does an elevator installation take?
What is the first step in installing an elevator inside the shaft?
In what order is the elevator assembled?
Who approves a new elevator for use in Israel?
What is the difference between installing an elevator with a machine room and an MRL elevator?
Why is a pit needed below the first floor?
Can an elevator be installed without scaffolding?
What should be done after the elevator is installed?
Let us accompany you and your elevator all the way, from day one onward
From the initial survey, through installation and handover, to the ongoing maintenance that keeps the elevator in good order for years. At Korsia we have been installing, maintaining, repairing and renovating elevators since 2000.